
 If you currently drive a vehicle with a manual transmission, you are likely all too familiar with the purpose of the third pedal that lies along the floorboard of your car, truck, or SUV’s driver compartment. This pedal actuates a manual transmission’s clutch, thereby allowing the engagement and disengagement of a transmission’s rotating components to facilitate shifting.
However, a hydraulic clutch relies upon fluid power to make effortless clutch actuation possible. Without this hydraulic pressure, a driver would be left to overcome the full pressure of the clutch itself when applying the clutch pedal.
At times it might be necessary to drain the hydraulic fluid contained within this system, such as when making repairs or when replacing individual system components. After refilling this system, air must be bled from within. While not overly complicated to complete, the process of bleeding a vehicle’s clutch should be done carefully and with a firm understanding of all intricacies that surround such a procedure.
The following guide will assist you in understanding the hydraulic clutch operation as well as how to bleed your vehicle’s hydraulic clutch should the need arise.
How Does a Hydraulic Clutch Work?
A hydraulic clutch operates on the principle of fluid power. By their very nature, hydraulic clutches are large impervious to clutch pressure. This makes fluids of this type ideal for power delivery. Forces can be greatly magnified through the use of pressurized fluid when acting upon a cylinder.
Much like a vehicle’s brake system, a hydraulic clutch system uses the pressure imparted by a driver’s application of the corresponding pedal to act upon fluid contained within a master cylinder. As a driver places pressure on the clutch pedal that lies beneath their foot, a linkage forces the forward motion of an attached push rod. This push rod causes reciprocation within the clutch master cylinder, which forces fluid contained within the master cylinder reservoir, or clutch fluid reservoir, to be dispersed outward under pressure.
As clutch fluid exits the master cylinder, it travels through a corresponding hydraulic line known as the clutch line. The other end of this line is attached to the system’s clutch slave cylinder. This slave cylinder is typically mounted to the side of a manual transmission or is contained within the confines of the bell housing itself.
Once the fluid has entered the slave cylinder, it acts upon a plunger and rod, which are pushed forward from the cylinder’s bore. This rod is attached at its opposite end to a clutch fork or clutch wrench. The actuation of this rod applies pressure to the system’s release bearing and pressure plate, thereby disengaging the clutch as a result.
The Importance of Bleeding a Clutch
If you are new to the operation of a manual transmission or hydraulic clutch system, you might be questioning the importance or significance of bleeding your vehicle’s clutch. The true reason behind this procedure is relatively straightforward and is only applicable if the hydraulic system itself has been opened, thereby introducing air to the system.
Air is easily compressed, while the hydraulic fluid is not. In fact, the fluid that is used within a hydraulic clutch system is specifically chosen for its inability to be compressed by forces typically exerted by clutch pedal actuation.
Air, when introduced into this system, compromises clutch fluid’s ability to apply sufficient force where necessary. A hydraulic clutch system is only capable of containing a set volume of fluid. When air bubbles enter this system, they take the place of clutch fluid that is used to amplify the force, ultimately acting upon the clutch’s release bearing and pressure plate. However, this volume of air will be compressed with each application of the clutch pedal.
If a proper clutch bleeding process is not followed and air is introduced to the hydraulic system, proper clutch operation will likely be impeded. In the majority of cases, the rod contained within the clutch slave cylinder’s bore will not travel far enough forward to fully disengage the clutch. This can pose difficulties when attempting to shift gears, especially when shifting into first gear from a stop. In severe cases of air contamination, the slave cylinder’s push rod might fail to move at all.
What Clutch Fluid Do I Use?
Another commonly asked question pertains to the type of clutch fluid to use when attempting to top-off or refill a hydraulic clutch system. The answer to this question is largely dependent upon the specifications of a vehicle’s manufacturer.
The majority of vehicles accept the use of brake fluid when filling their hydraulic clutch system. More specifically, DOT 3 brake fluid is one of the most commonly used of all hydraulic fluids in clutch-related applications. However, one should never assume this to be the case for their own vehicle. Some manufacturers specify the use of specialty “clutch fluid” when filling systems of this nature.
In many cases, the exact fluid specified for use can be found atop a vehicle’s clutch fluid reservoir cap. Alternatively, one can consult their vehicle’s owner manual for more information regarding approved clutch fluid types. If no owner’s manual is present, a call to your local dealership will often yield the information.
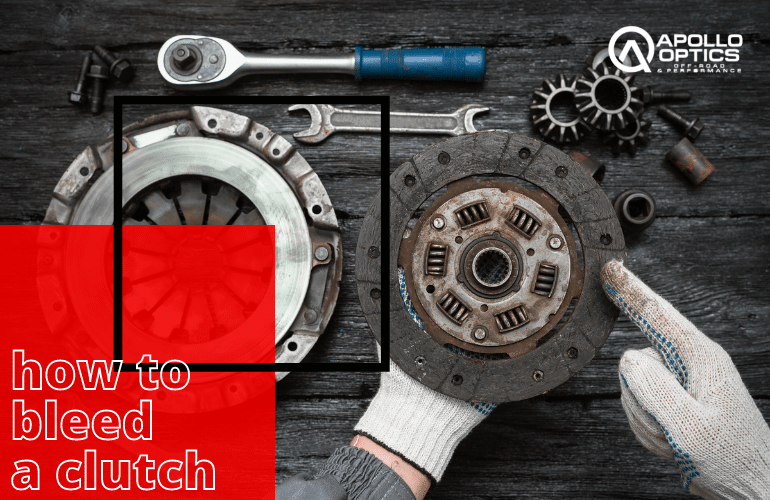
How to Bleed a Clutch
A vehicle’s hydraulic clutch system can be bled in more than one manner. However, each procedure has its place, and the ultimate determination of which method to use should be based upon the need to eliminate all remaining air in the most efficient manner possible for a given situation.
The following will outline the most commonly employed methods for bleeding a hydraulic clutch system.
Manual Bleeding
A clutch can be manually bled without any need for specialty tools. However, doing so requires an assistant to be present. The following steps will walk you through this process.
- Top Off Clutch Fluid: Prior to beginning the bleeding procedure, it is important to top off the clutch fluid contained within the system’s master cylinder. This prevents the master cylinder from running dry of fluid during the bleeding process, which can ultimately introduce additional air into the system. When topping off your vehicle’s clutch fluid, ensure that you are using the approved fluid for your particular application.
- Raise Vehicle (if necessary): If your vehicle does not sit high enough to allow access to its transmission without being raised, now is the time to drag out the nearest jack and jack stands. Carefully raise your vehicle by its frame until the desired height has been reached. Before any work begins, it is absolutely essential to place a set of quality jack stands beneath your raised vehicle.
- Locate The Slave Cylinder: You will now need to locate your vehicle’s slave cylinder. On most vehicles, the slave cylinder is bolted to the side of the transmission in plain sight. However, some vehicles feature a slave cylinder that is located within the transmission’s bell housing. In applications such as this, the slave cylinder bleeder valve, or bleeder screw, can still be accessed externally.
- Have An Assistant Pump the Clutch: Have an assistant depress the vehicle’s clutch pedal, pushing the pedal itself as far down as possible. In most applications, when the bleeding procedure first begins, the clutch pedal will push all the way to the floor with little effort.
- Loosen The Bleeder: With the clutch pedal still depressed, you will now loosen the slave cylinder’s bleed screw. A turn of ¼-½ revolution will be sufficient to allow both air and fluid to escape. Passing fluid can be caught in a drain pan or routed as desired by attaching a piece of clear hose to the slave cylinder’s bleeder. When fluid flow has slowed, retighten the bleeder valve.
- Repeat As Necessary: After retightening the bleed valve, have your assistant pump and depress the clutch pedal in the same manner as described above. With the pedal depressed, you will again loosen the slave cylinder’s bleeder valve, looking for remaining signs of air. This process will be repeated until no additional air escapes when cracking or loosening the bleeder.
- Lower Vehicle and Test Drive: With the slave cylinder sufficiently bled, you will lower your vehicle to the ground before again checking and topping off the clutch master cylinder reservoir. With the reservoir filled to its marked capacity, reinstall the corresponding cap. You will now be ready to start your vehicle and take it for a test drive to ensure that proper clutch operation has been restored.
Vacuum Bleeding
A hydraulic clutch system can also be purged of all air with the use of a vacuum bleeding procedure. This procedure requires the use of a vacuum pump but can be completed in short order and without the assistance of a second individual. The steps to completing this process are as follows.
- Top Off Clutch Fluid: Prior to beginning the bleeding procedure, the clutch master cylinder’s fluid reservoir should be filled to capacity with an approved clutch fluid. This prevents the introduction of air into the system during the bleeding process.
- Lift Vehicle (if necessary): If you are unable to reach your vehicle’s transmission, it will be necessary to raise and secure your vehicle with the assistance of a quality floor jack/jack stands. With the vehicle raised to an appropriate height, place a set of jack stands beneath each frame rail.
- Locate The Slave Cylinder: You will now locate your vehicle’s slave cylinder. This component can typically be found bolted to the side of a vehicle’s transmission, though some vehicles feature a slave cylinder that is mounted within the internal expanses of the transmission’s bell housing. However, slave cylinders of this type do feature an easily accessible, external bleed valve.
- Hook Vacuum Pump to Bleeder: You will now attach the tubing from your vacuum pump to the slave cylinder’s bleeder valve. While all vacuum pumps operated in the same general manner, slight variances can be found from one particular model to the next. Always consult manufacturer instructions regarding the operating procedure for your specific vacuum pump.
- Pull Air from Clutch System: With your vacuum pump attached to the slave cylinder’s bleeder, continue pumping air and fluid until an absence of additional air bubbles is noted. During this step, it is essential to monitor the fluid level of your vehicle’s clutch master cylinder reservoir. Top of clutch fluid as necessary. After all the air has been expelled, retighten your slave cylinder’s bleeder valve and remove your vacuum pump’s tubing.
- Lower Vehicle and Test Drive: You will now be ready to lower your vehicle from the previously placed jack and jack stands. Again, top off the fluid level within your vehicle’s clutch master cylinder reservoir, reinstalling the cap when finished. You may then start your vehicle, testing to ensure that proper clutch operation has been restored.
A Word on Gravity Bleeding
Though gravity bleeding is often used as an initial step in the clutch bleeding process, it should never be relied upon to completely rid the hydraulic system of all atmospheric air. Quite the contrary, a gravity bleed should be followed by either of the two bleeding methods mentioned above. Doing so ensures that all traces of remaining air are removed from the hydraulic clutch system in their entirety.